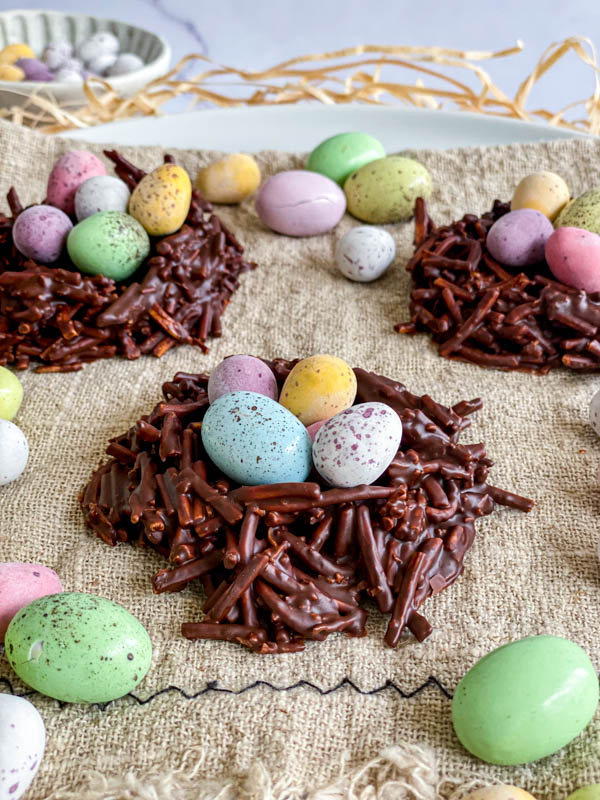
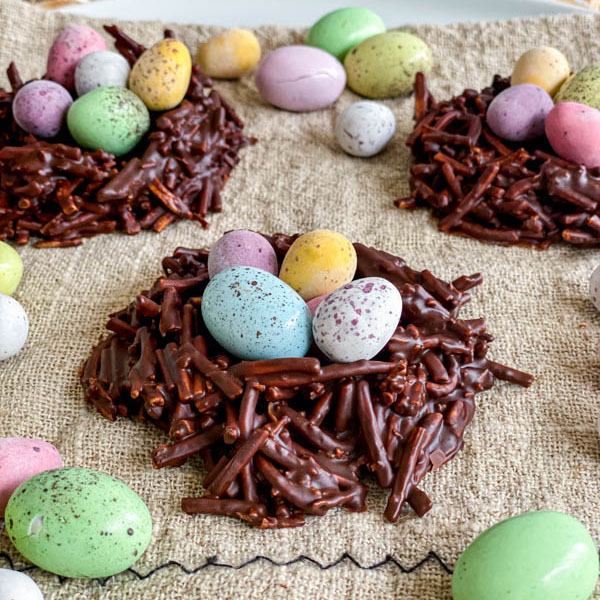
These Easter Chocolate Nests are a great treat to whip up at Easter. Not only do they look amazing but they taste fantastic too! These Nests will look wonderful as a topping for Easter themed cakes, cupcakes and cheesecakes, although they can also be eaten on their own. Made using only 4 ingredients this melt and mix recipe is a really fun one to involve the kids in as they are so easy to make.
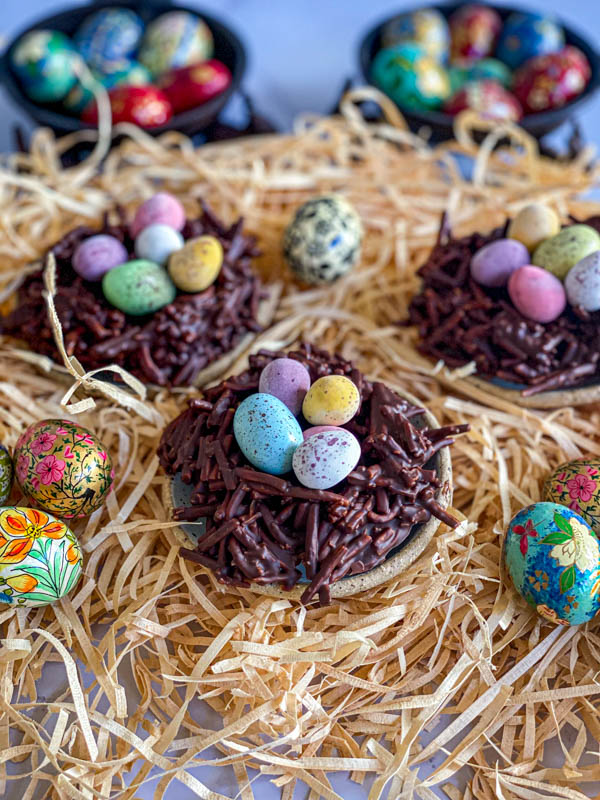
The nests are made using 3-4 ingredients: chocolate, fried noodles, desiccated coconut and mini easter eggs. I use Chang’s fried noodles which are readily available at most supermarkets (I have also given other alternatives in the ‘Ingredients’ section of this post). This recipe is very simple to make. Once the chocolate is melted, the fried noodles and coconut are added and mixed so everything is coated in chocolate. Then they are shaped into the nests and refrigerated. A really fun Easter activity to involve the children in!
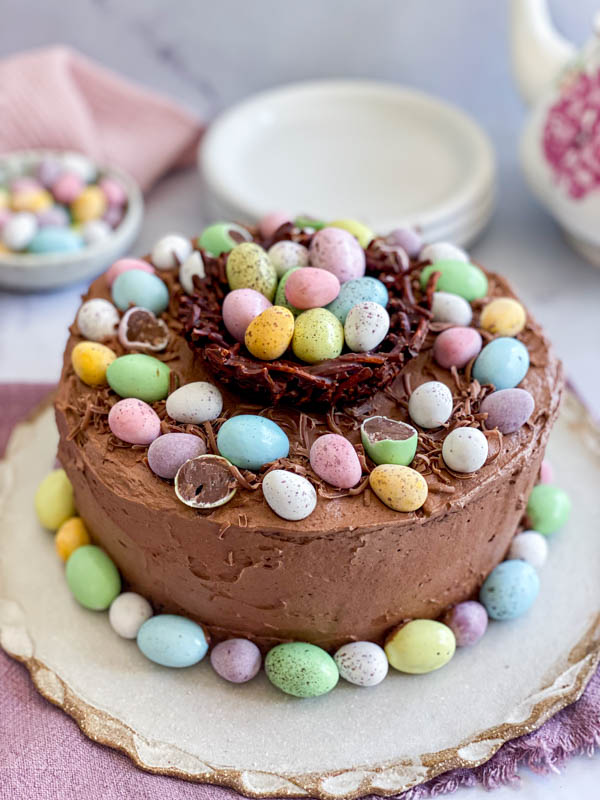
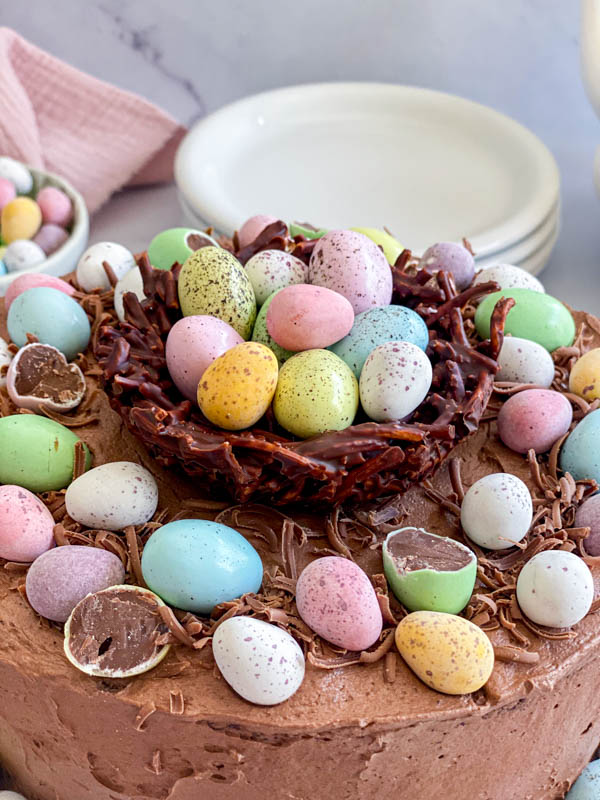
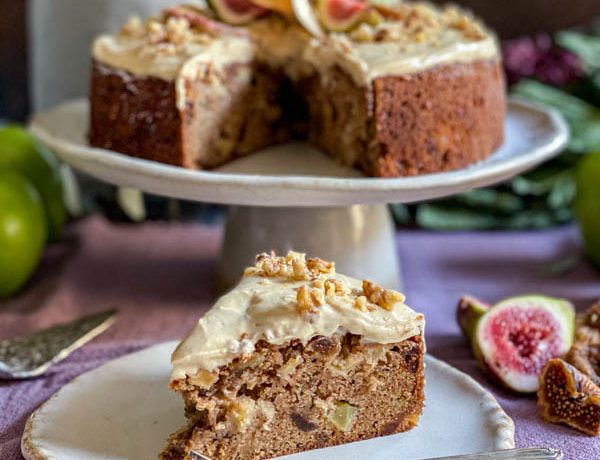
While they can be served and eaten as they are, they can also be placed on top of cakes, cupcakes or cheesecakes to give an instant Easter theme to your bakes. In this photo below, you can see how I have used one to decorate my Easter themed ‘Easy Chocolate Cake’ – you can find the recipe for my ‘Easy Chocolate Cake’ here. No matter how you use these nests, they will instantly add some fun and colour to your Easter table.
Why I love this recipe:
It is very quick and easy to prepare and a great recipe for the kids to do.
It uses only 3 or 4 ingredients and takes about 15 minutes to make.
The chocolate nests can be prepared 2-3 days ahead of time and they keep well in the fridge for 7-10 days.
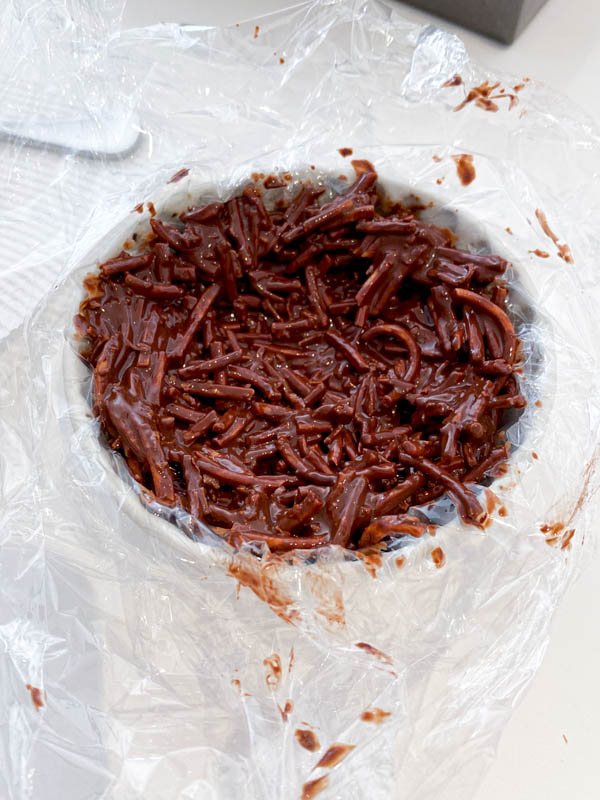
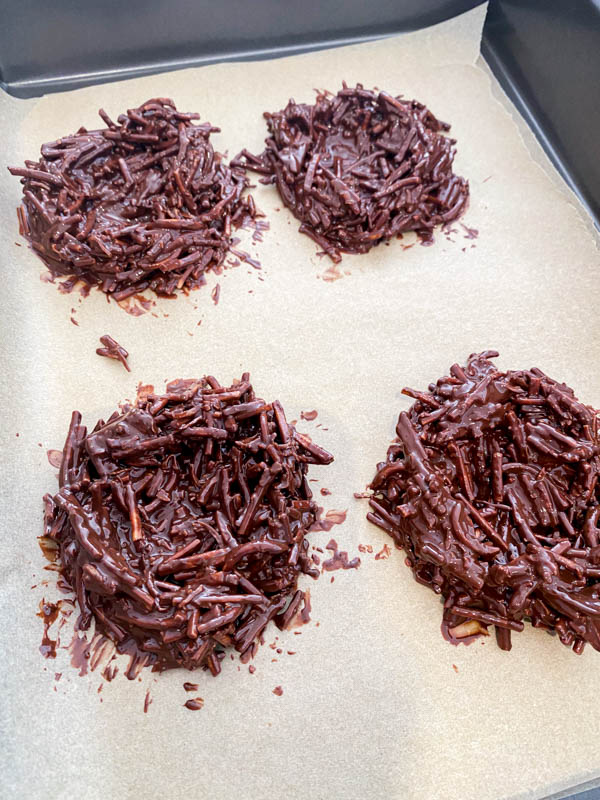
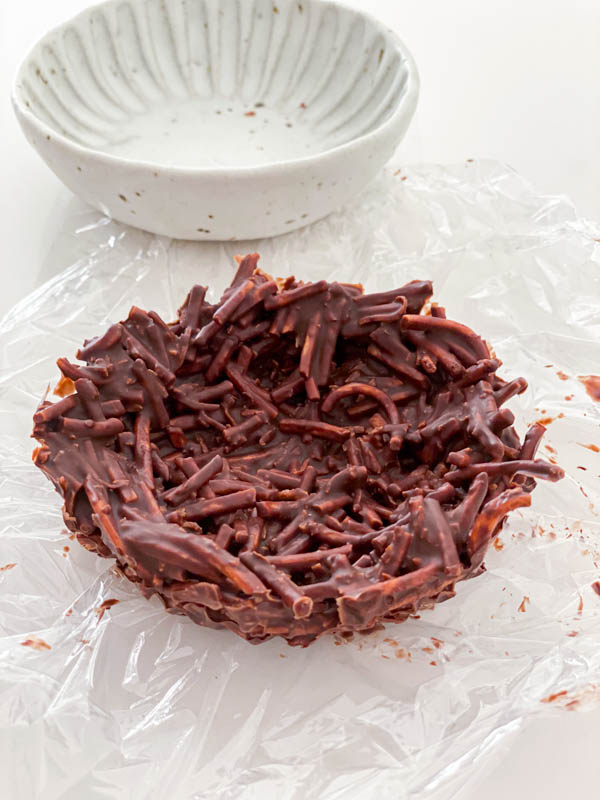
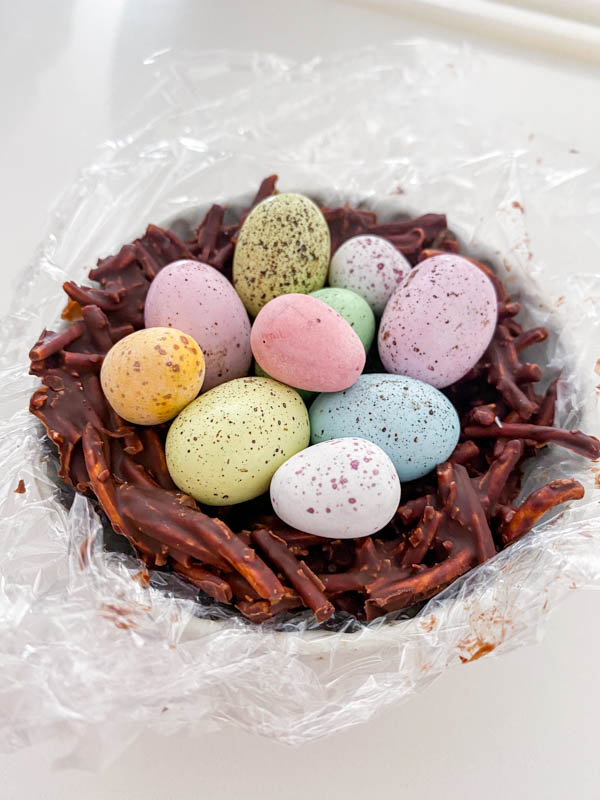
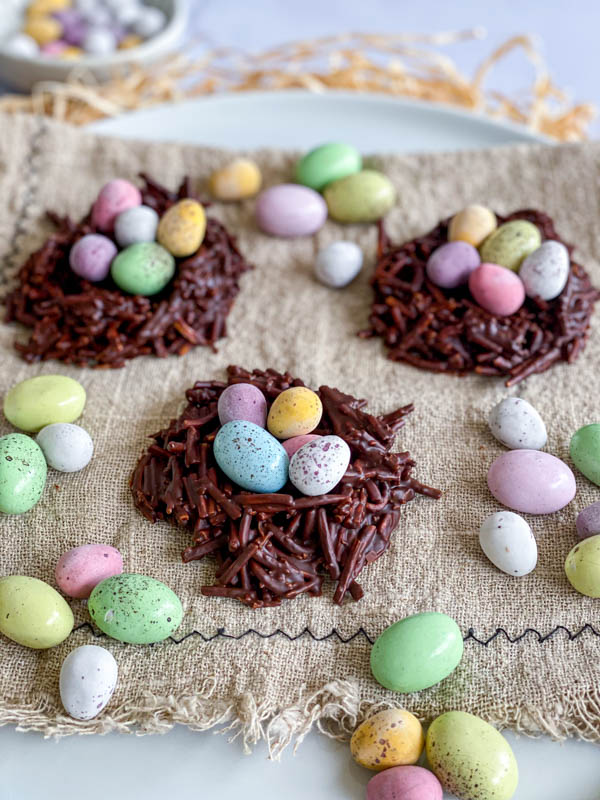
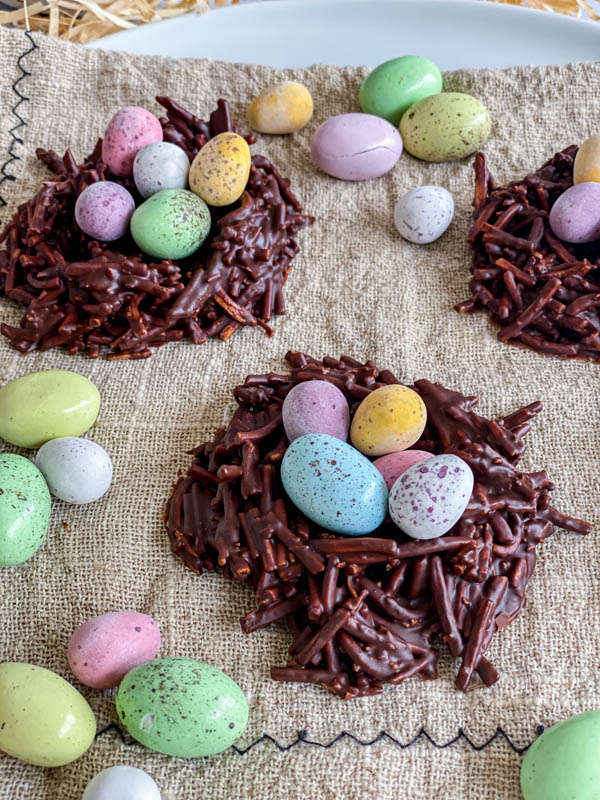
The mixture will make up to 8 chocolate nests but you can vary the size depending on what you use them for. I made a slightly bigger nest for the cake centrepiece by using a small dipping bowl lined with cling wrap as a mould. Below, you can see smaller nests although you can make them even smaller again if using to decorate cupcakes.
Ingredients to make this recipe:
- Chocolate – use any good quality eating chocolate. In this batch I used a mix of 50/50 milk and dark chocolate – so 100g milk chocolate and 100g dark chocolate (70%). I also enjoy making these with milk chocolate only.
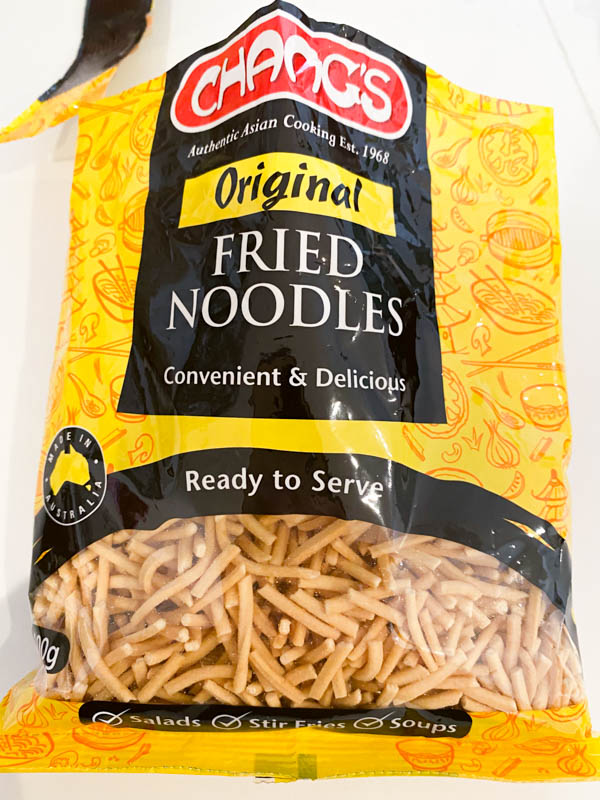
- Fried Noodles – I use Chang’s Fried Noodles (see photo in ‘step by step instructions’ below) which are readily available in most supermarkets but any fried noodles will work. Other alternatives to fried noodles are: cornflakes, crushed shredded wheat, crushed Weetbix, shredded coconut, broken up pretzel sticks and even rice bubbles. I personally like the ‘twig’ like quality that fried noodles give though.
- Coconut – desiccated or shredded (optional). I like the taste of coconut with the chocolate but if you are not a coconut fan then just leave it out.
- Mini Easter Eggs – I use a combination of Cadbury mini Speckled Eggs and Darrell Lea Speckled Eggs to fill my nests but you can use any mini eggs you like.
Step by Step Instructions:
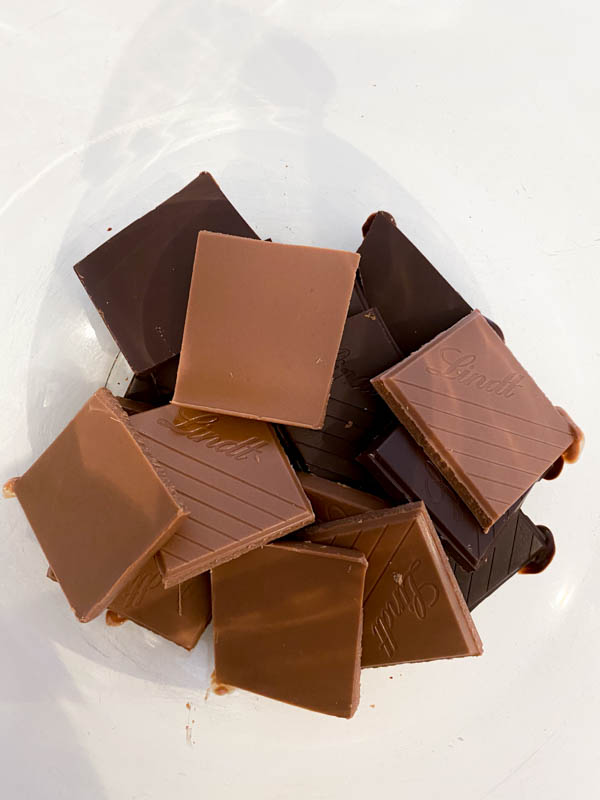
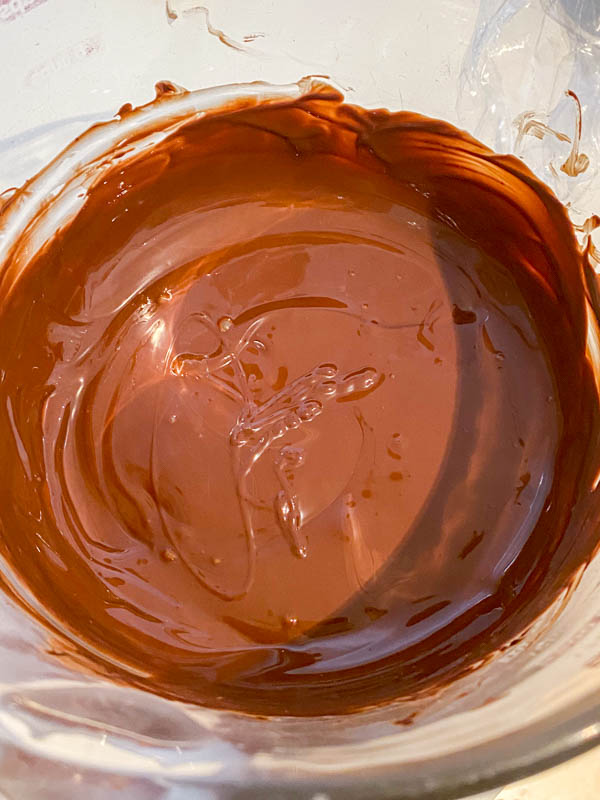
- 1. Place the chocolate pieces into a microwave proof bowl and microwave on 50% power in 30 second bursts, stirring each time until melted. This will take approximately 2-3 minutes. Alternatively this can be done over a double broiler on the stovetop.
- 2. Here is a photo of the brand of fried noodles I use.
- 3. The chocolate is now melted and ready for the ingredients to be added.
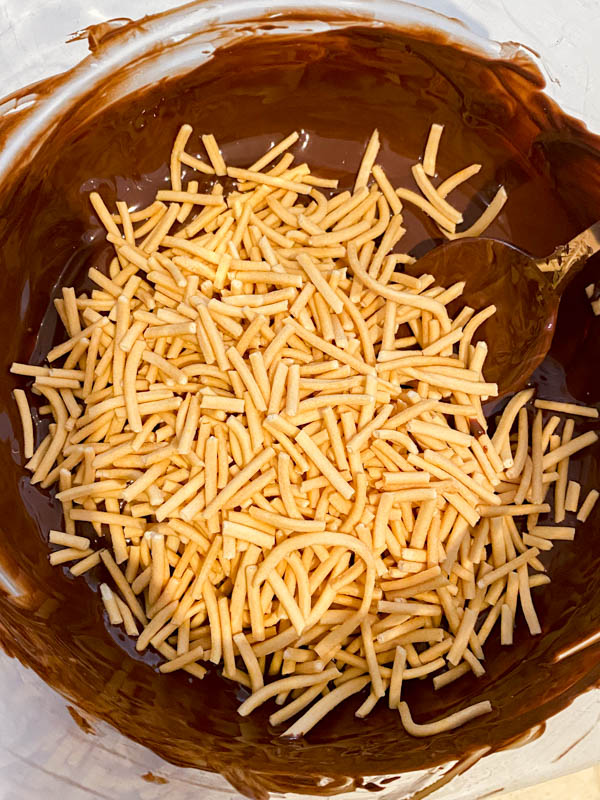
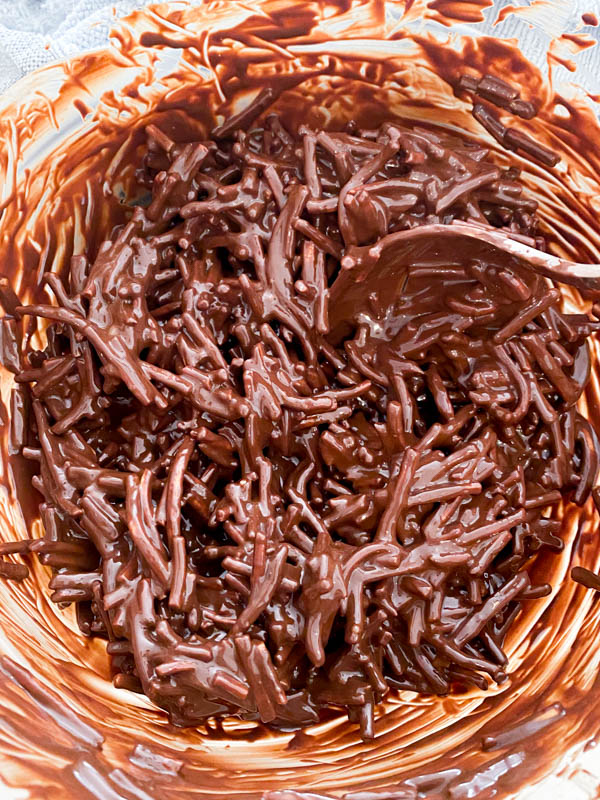
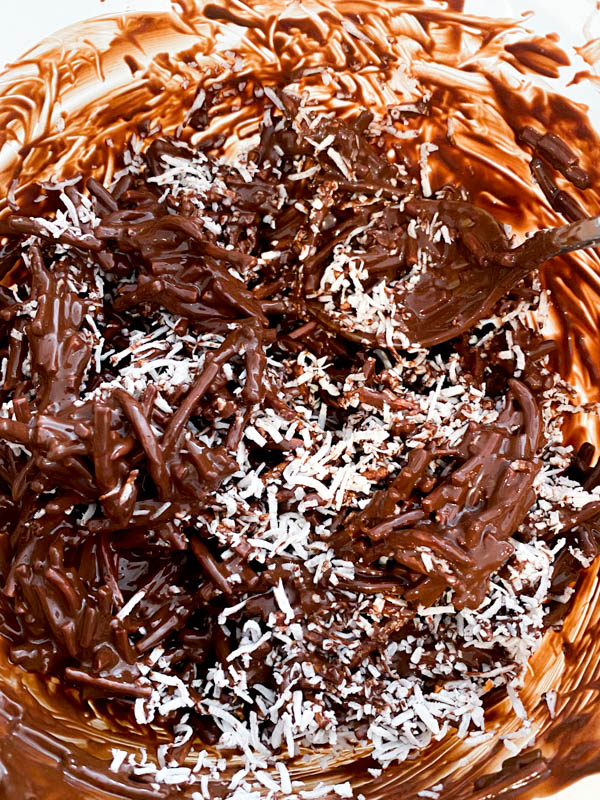
- 4 and 5. Add the fried noodles to the chocolate and stir well to ensure everything is coated in chocolate.
- 6. Add the coconut (if using) and stir again.
- 7 and 8. Take a good spoonful of the mixture and shape or mould into nests. In these photos you can see in pic 7 that I have made a slightly bigger nest by using a small dipping bowl lined with cling wrap to mould it in. In this case I wanted a bigger nest as a centrepiece for a cake. In pic 8, I have made smaller ones by placing spoonfuls onto a flat tray lined with baking paper. Here you use your fingers to shape into a rough circle and then make an indent in the middle. I then take small amounts (even a stick at a time and build up the sides if required). It can get a little messy (chocolate fingers!) but it’s fun and once you have done one, you’ll be right. Another way to make the nests is to shape them in a cupcake tray lined with paper cases. Once shaped, place them into the fridge to set for 20-30 minutes.
- 9. Once set, they are ready to be filled with eggs. Another option is to add the mini easter eggs to the unset chocolate nests before placing them into the fridge so the eggs stay in place.
- 10, 11 and 12. The filled Easter Chocolate Nests ready to serve!
Tips and Tricks for Success:
These nests are very easy to make but can be a little messy. They are a lot of fun and children will love making them with you. Don’t be too fussy with the shaping – once you have done the first one, the rest will be easy.
Once you have shaped the Nests into circles and made an indent in the middle, you can pick out a few chocolate noodle bits and build up the sides a little if you need to. You can also make bigger or smaller sized nests to decorate cakes, cupcakes or cheesecakes. To make bigger ones I find using a small dipping bowl lined with cling wrap as a mould the easiest way.
The nests can be made 2-3 days in advance and I recommend you do that. They will keep in the fridge in an airtight container (store them flat and not on top of each other) for up to 10 days.
The mini chocolate Easter eggs can be added to the Nests before placing them in the fridge if you prefer them to stick. This might be a consideration if you are transporting them, but it’s up to you.
Other Easter recipes for you to try:
Some other Easter treats that have been very popular on my site are my Easter Rocky Road and my Easy Chocolate Cake which I have decorated in an Easter theme.
Equipment
- large microwave proof bowl
- flat baking tray or tray
Ingredients
- 200 g milk chocolate or 50/50 milk and dark
- 100 g fried noodles
- 2 tbsp desiccated coconut or shredded
- 125 g mini easter eggs see notes
Instructions
- Line a baking tray with baking paper and set aside.
- Break up the chocolate into small pieces and place into a microwave proof bowl. Microwave on 50% power for 30 second bursts, stirring each time until melted. Alternatively you can melt in a double broiler on the stovetop.
- Once the chocolate is melted, add the fried noodles and stir well until everything is coated in chocolate. Now add the coconut if using and mix again.
- Take a large spoonful of mixture and place on the lined tray. Using your fingers, shape into a circle and press a small indent in the middle to form a nest. To help build up the sides, take a few chocolate coated noodles and layer up the sides if needed. Alternatively you can use a muffin tin lined with paper cases and shape them in these.Continue with the rest of the mixture to form 8 small nests. You can make larger or smaller nests if you prefer (see notes).
- Once the nests have been shaped, you can place them straight into the fridge to set for 30 minutes, or you can add the mini eggs to them first if you want the eggs to stick and stay in place. Alternatively, add the eggs to the nests once they have set and just before serving.
- Storage: The chocolate nests can be made 2-3 days in advance and kept in an airtight container (single layer) in the fridge for up to 10 days.
Notes
Ingredients to make this recipe:
- Chocolate – use any good quality eating chocolate. In this batch I used a mix of 50/50 milk and dark chocolate – so 100g milk chocolate and 100g dark chocolate (70%). I also enjoy making these with milk chocolate only.
- Fried Noodles – I use Chang’s Fried Noodles (see photo in ‘step by step instructions’ below) which are readily available in most supermarkets but any fried noodles will work. Other alternatives to fried noodles are: cornflakes, crushed shredded wheat, crushed weetbix, shredded coconut, broken up pretzel sticks and even rice bubbles. I do like the twig like quality the fried noodles give though.
- Coconut – desiccated or shredded (optional). I like the taste of coconut with the chocolate but if you are not a coconut fan then just leave it out.
- Mini Easter Eggs – I like to use a combination of Cadbury mini Speckled Eggs and Darrell Lea Speckled Eggs to fill my nests but you can use any mini eggs you like.


No Comments