This indulgent and delicious Brownie Ice Cream Cake is a super easy and fun dessert to make. It is made up of two layers – a chocolate brownie base that is topped with ice cream. Loved by adults and children alike, this Chocolate Brownie Ice Cream Cake is the perfect accompaniment to any dinner party or birthday celebration. It can be decorated as you please, combining your favourite toppings and made ahead of time, making it ideal for fuss-free entertaining.
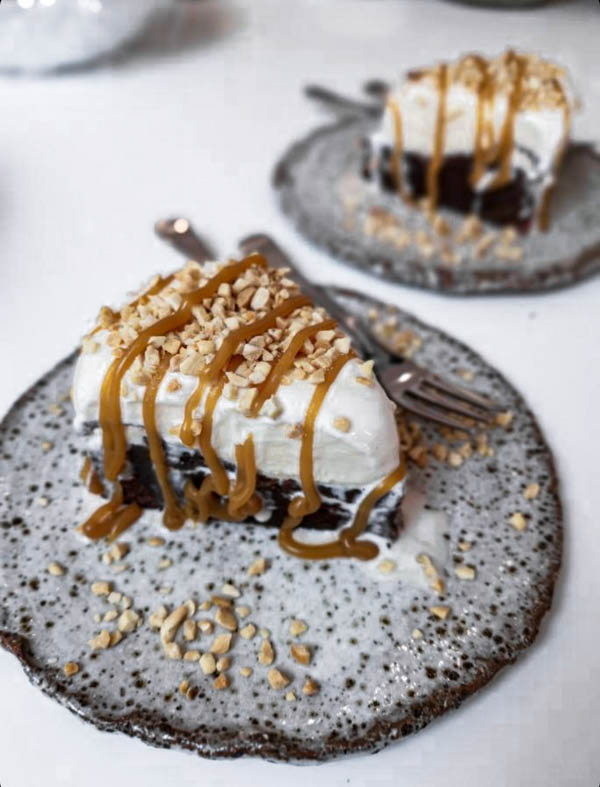
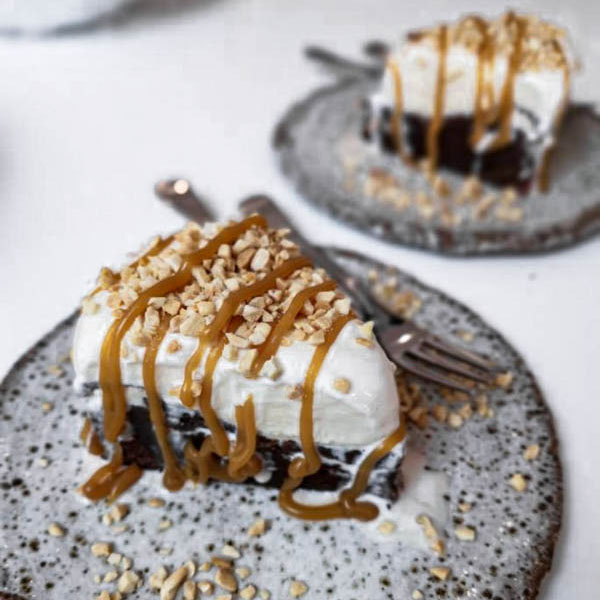
This is a dessert that can be customised to suit your tastes as you can choose your own flavour of ice-cream as well as the toppings you like. I have opted for a good quality store-bought vanilla bean ice-cream which I have sprinkled with chopped roasted peanuts and drizzled with Salted Caramel sauce (I use Maggie Beer) – a sweet, salty and delicious combination. If you choose to use store-bought ice-cream and toppings it makes this dessert even easier. Keep reading to see ice-cream and topping suggestions in the ‘ingredients to make this recipe’ section of this post.
This cake uses my Chocolate Brownie recipe for the base (slightly altered). It is a very easy melt and mix recipe that isn’t too rich.

Why I love this recipe:
Firstly it is very simple to make. You do have to allow time for the cooling of the brownie and the freezing time, but once you have made the brownie (which is also a very simple recipe), the rest of the cake is ridiculously easy to do.
It can be made ahead of time making this ideal for entertaining. Simply remove from the freezer 10-20 minutes before serving to allow the cake to defrost slightly and the ice-cream to soften a little. In this time, you can decorate the cake and even get the children to help if it’s a family affair.
Ingredients to make this cake:
- Butter – salted butter.
- Dark Chocolate – I like to use a 45-60% cocoa content chocolate for this brownie.
- Eggs
- Sugars – both brown and caster sugar are used in this. A combination is nice but feel free to use all caster sugar if you prefer.
- Cocoa Powder – any cocoa powder is fine. I have used Dutch Cocoa and Cadburys Cocoa at different times.
- Flour – plain all purpose white flour.
- Vanilla Extract
- Ice Cream – I use a good quality store-bought ice cream but you can use homemade ice cream if you prefer. I mostly use vanilla however you can use any flavour you like! You can also use gelato.
- Toppings – I have used store-bought chopped roasted peanuts and Maggie Beer’s Salted Caramel Sauce which works beautifully with Vanilla Ice Cream. You can choose any toppings you like depending on the occasion and/or allergy considerations.
Topping Suggestions: Chocolate shavings, Sprinkles, Toasted Coconut, Chocolate Sauce, Strawberry Sauce, Berry Couli, crushed chocolate bars, crushed biscuits, honeycomb pieces, toasted nuts, fruits.
Ice Cream Suggestions: You can also start with a vanilla base and add things like chocolate chips or nuts to your ice-cream. You can also swirl jam, marmalade etc through the ice-cream when it is partially melted.
If you have the time, you can also make a ‘Neapolitan’ style cake by using two flavours of ice-cream and layering them (ie 500ml each flavour). Strawberry and Vanilla are good options but you can use any flavours you prefer. You would need to allow extra time as you would have to freeze the first layer completely before adding the second flavour.
Step by Step Instructions:
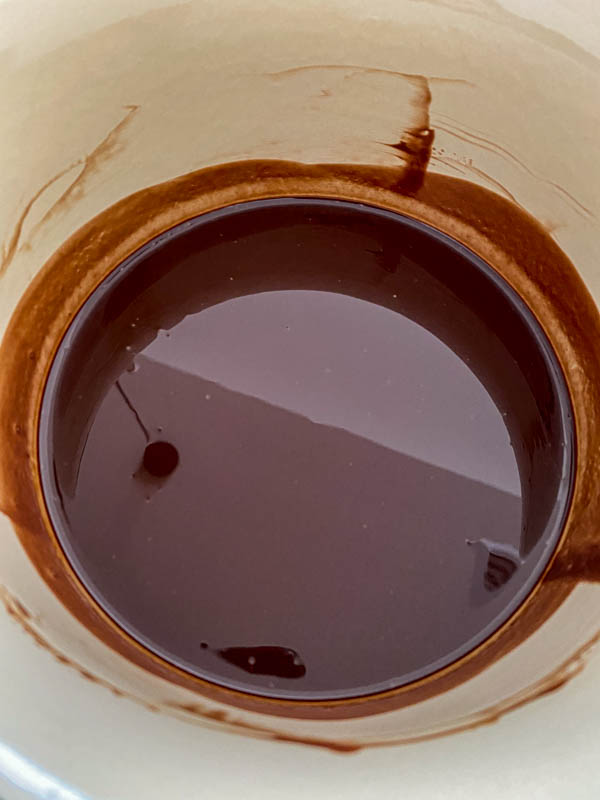
Firstly melt the butter and chocolate over low heat stirring frequently until just melted, smooth and glossy. This can also be done in the microwave. Set aside to cool for 10 minutes while you carry on with the recipe. 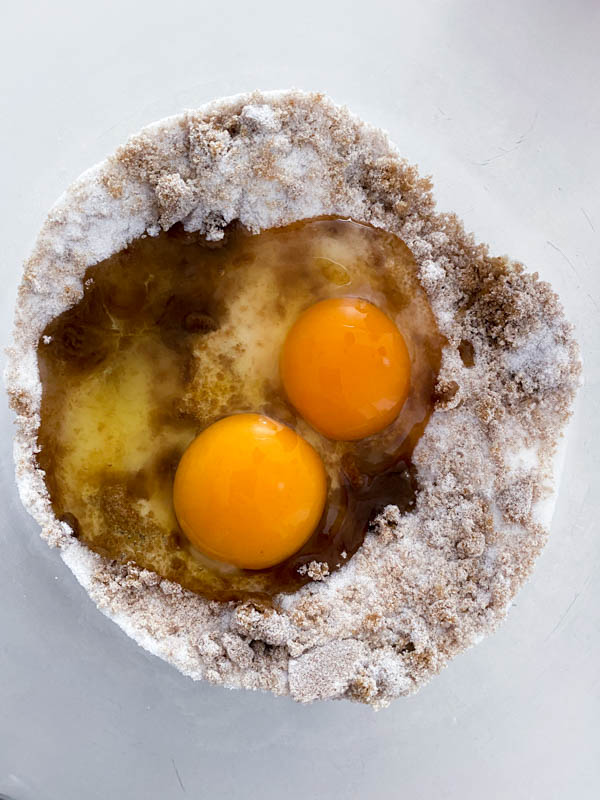
Add the sugars and egg to a bowl and beat together until thick and pale. 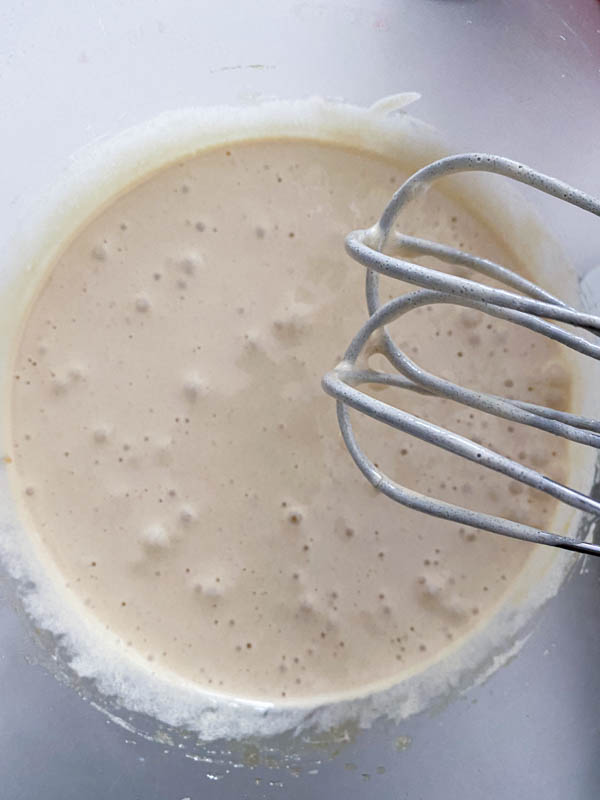
Using a hand held beater makes quick work of this. You want the mixture to be thick so that when you lift the beaters, the mixture leaves a trail on top when first drizzled over. 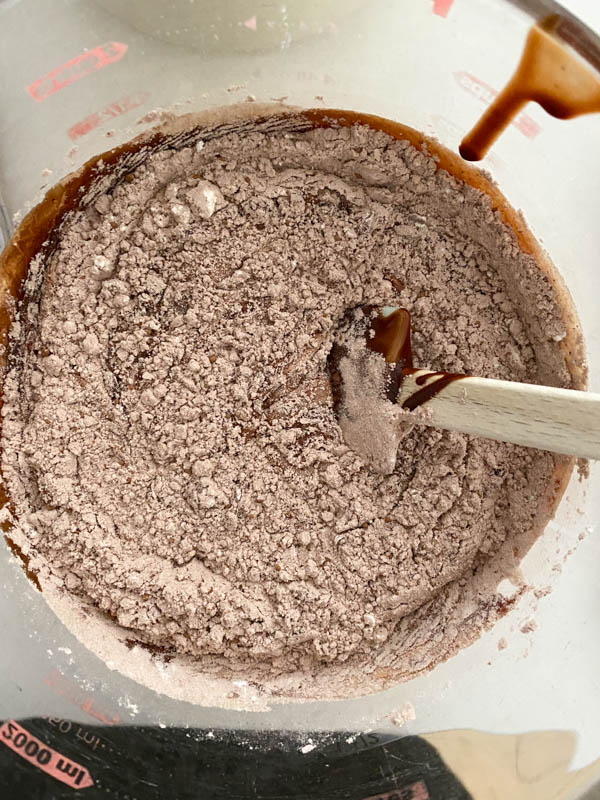
Stir in the cooled chocolate and then sift in the flour and cocoa. 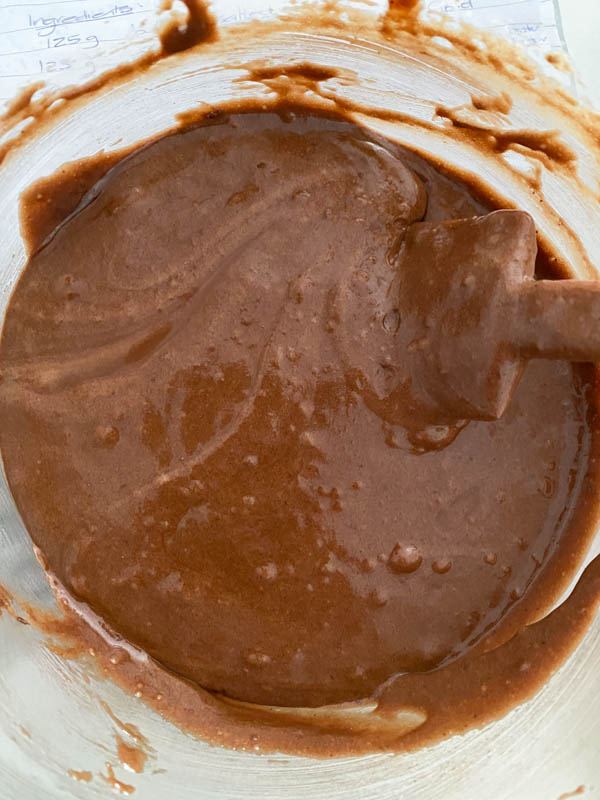
Mix together until smooth and combined. 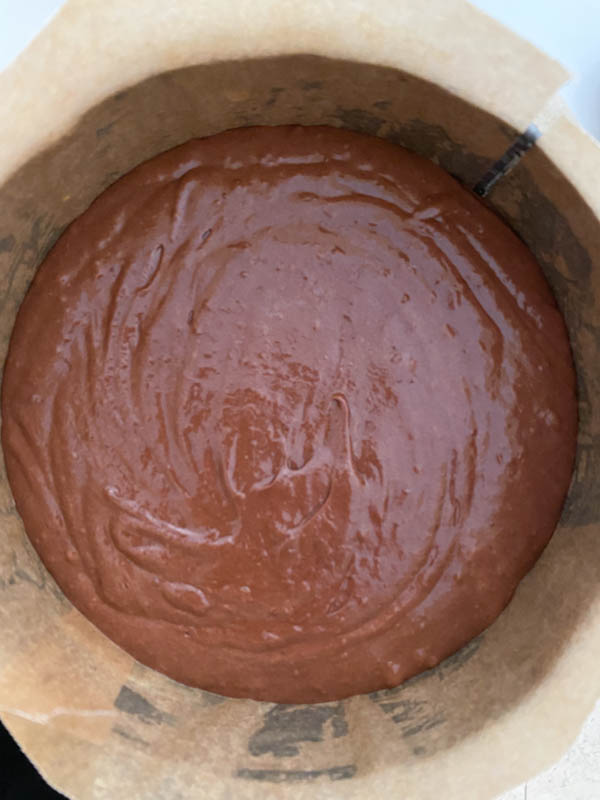
Pour into a greased and fully lined (bottom and sides) round springform or loose bottom 20cm cake tin. 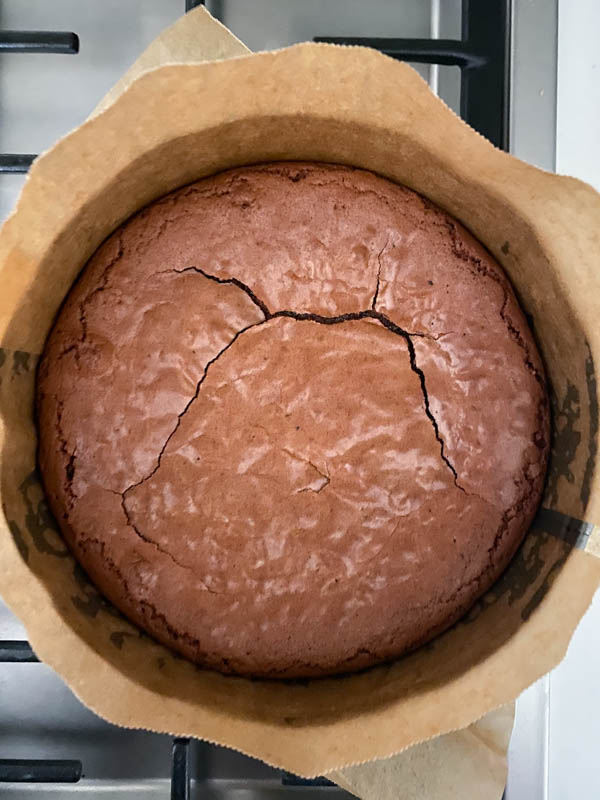
Bake in a preheated 180°C (355°F) oven for 30-40 minutes until cooked but still sticky in the centre. Remove from the oven and set aside in the tin to cool down completely. The brownie must be completely cooled before proceeding to the next step. Once it has cooled completely, gently press around the edges of the brownie with your fingers so the brownie is level (often the sides rise more than the middle). This also helps seal the sides and stops any ice cream seeping down the sides. 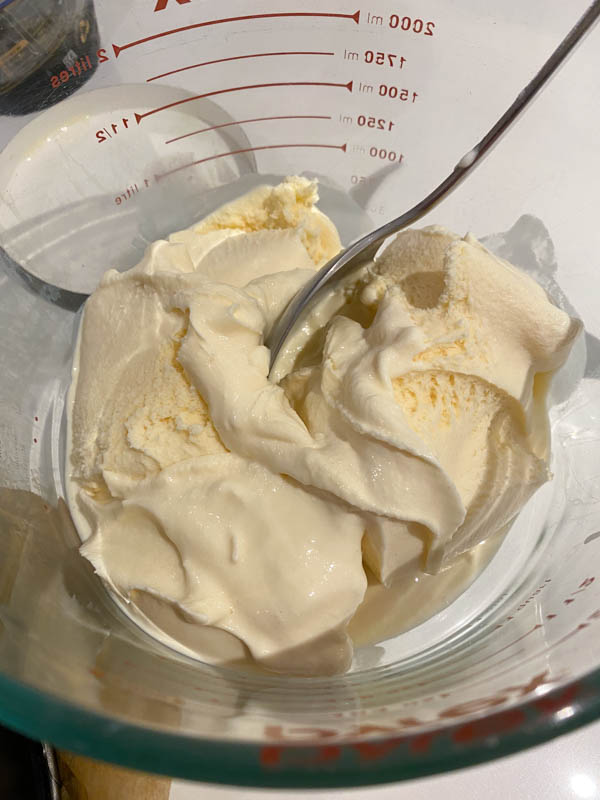
When the brownie base is cooled, remove the ice cream from the freezer and allow it to soften for approximately 20 minutes or until it is just soft enough to handle. Stir and combine the ice cream so the more melted parts are mixed together and it is a nice soft consistency. Pour this over the brownie base and smooth out so it is all even. Place in the freezer making sure it is level and flat. Freeze for 4-5 hours or overnight if you have time. 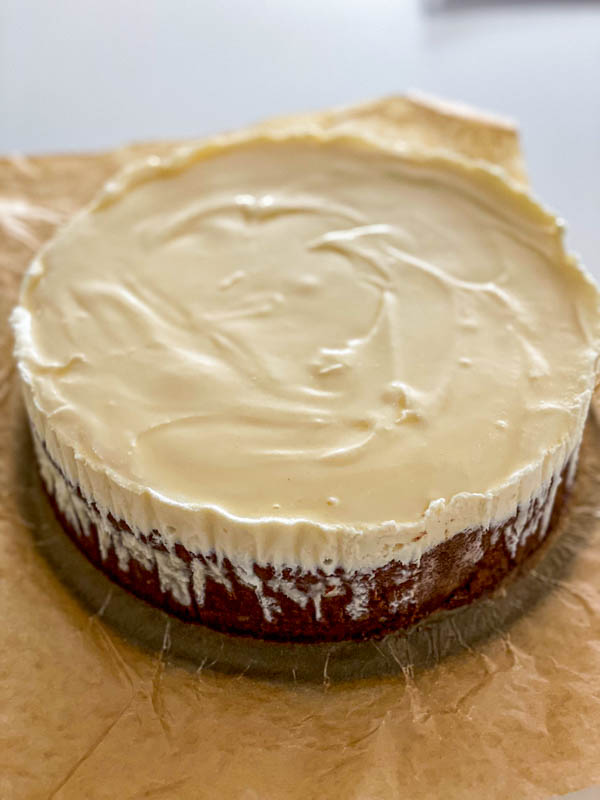
Remove from the freezer about 15-20 minutes before serving to allow the brownie to defrost slightly and the ice cream to soften slightly. You can decorate the cake as a whole or cut it into slices first and plate them up, then decorate them. I often pre-cut the cake ahead of time, then bring out the slices, plate them and set them aside for 10-15 minutes before decorating and serving.
Tips and Tricks for Success:
- Before you start this recipe, make sure you have enough room in your freezer for your cake tin to sit upright and flat so you can just pop it straight in when it’s time to freeze it.
- It’s important to line both the base and sides of the baking tin with baking paper. This makes it much easier to un-mould the cake cleanly from the tin. Using a springform tin is important too or a loose bottom one.
- When baking the brownie, cooking times vary depending on your oven. This brownie will take approximately 30-40 minutes.
- Another important step is to let the brownie cool completely – no shortcuts here. The brownie must be completely cooled down before adding the ice-cream topping.
- Once the brownie has cooled down, it is a good idea to level the brownie out by gently pressing around the edges of the brownie as the sides often rise more than the middle and there is often a slight gap between the edge and the tin. By gently pressing the edges down you are not only levelling it out (which makes it look more uniform) but you are also pressing the edges back down and filling the gap which means no ice-cream will leak down the sides when added.
- When melting the ice-cream, which takes approximately 15 minutes, only melt it until it is able to be mixed together to form a thick batter-like consistency. You don’t want to melt it completely. Once it is partially melted, use a spoon to mix the more melted parts into the still firmer parts so it is all the same consistency, then spoon this onto the cooled base and gently spread it out evenly to form the top layer. Freeze immediately.
- To freeze the cake will take 4-5 hours but if you have the time, making it the day before it is required and freezing overnight is ideal. This cake can be made up to 7-10 days in advance.
- You can choose to decorate the cake as a whole cake, or slice and plate up before decorating slices individually. Either way, it is best to remove the frozen cake from the freezer 10-20 minutes before serving/decorating to allow the brownie to defrost slightly and the ice-cream to soften a little. Enjoy!
Remove from the freezer about 15-20 minutes before serving to allow the brownie to defrost slightly and the ice cream to soften slightly. You can decorate the cake as a whole or cut it into slices first and plate them up, then decorate them. I often pre-cut the cake ahead of time, then bring out the slices, plate them and set them aside for 10-15 minutes before decorating and serving. 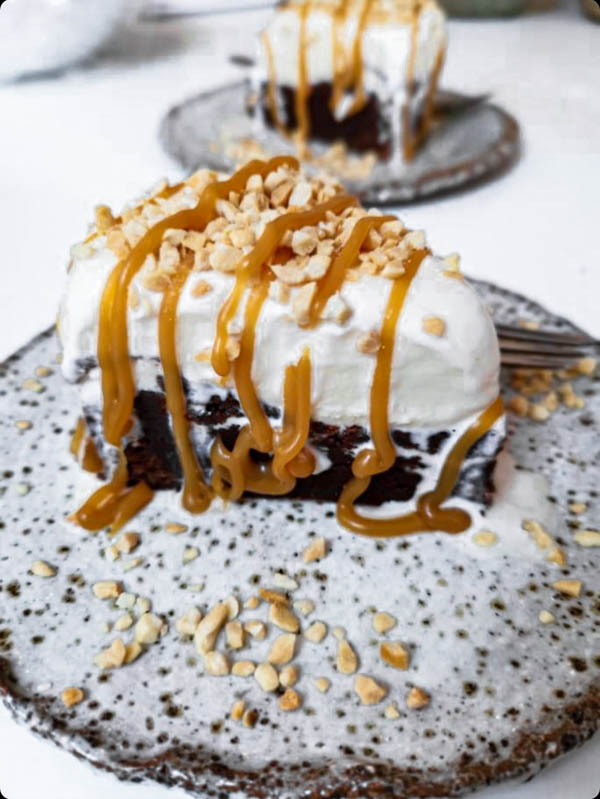
You can decorate individual slices as seen here, or as a whole cake.
Equipment
- 20cm (8in) round springform cake tin
- Baking paper
- small saucepan
- mixing bowl
- Hand-held Beater
Ingredients
- 125 g butter salted
- 125 g dark chocolate 45-60% cocoa
- 2 eggs large
- 1 tsp vanilla extract
- 3/4 c caster sugar (175g)
- 1/4 c brown sugar (45g)
- 1 tbsp cocoa powder sifted
- 100 g plain flour sifted
- 1 l vanilla ice cream or any good quality ice-cream of your choice – see notes
- toppings of your choice to decorate see notes
Instructions
- Preheat oven to 180°C (355°F). Grease a 20cm (8in) round springform cake tin and line the bottom and sides with baking paper.
- Cut butter into small cubes and break chocolate into small pieces. Place the butter and chocolate into a small saucepan over low heat, stirring until melted, glossy and smooth. Remove from heat and set aside to cool for 10 minutes.
- Beat eggs, caster sugar and brown sugar in a large mixing bowl until thick, pale and creamy. Stir in the cooled melted chocolate mixture along with the vanilla extract. Sift the flour and cocoa into the bowl and mix everything together until combined. Pour the brownie batter into the prepared tin and bake in the preheated oven for 30-40 minutes until cooked but still slightly tacky in the centre.
- Remove from the oven and set aside to cool completely in the tin. Once cooled, use your fingers to lightly press the edges of the brownie down slightly so the brownie is nice and level and pushed up to the edges of the tin ensuring there is no gap between the brownie and the tin (see notes). The brownie must be completely cooled down before proceeding to the next step.
- Remove the ice-cream from the freezer and allow it to defrost slightly (approximately 15-20 minutes). You want the ice-cream to be partially defrosted – you don’t want to melt the ice-cream completely. Tip the partially melted ice-cream into a bowl and use a spoon to mix and combine the more melted parts into the more frozen parts to achieve a spreadable but still thick consistency. Once mixed together, spoon or tip the ice-cream onto the brownie and carefully spread it out to form an even layer. Place in the freezer for a minimum of 4-5 hours or overnight.
- The cake will keep in the freezer for 10 days so can be made in advance.
To serve:
- Remove from the tin and peel away the baking paper. Place onto a plate and allow to defrost slightly for 10-20 minutes before serving. Decorate with toppings of your choice.You can also pre-cut the cake into slices and plate and decorate individually. In these photos I have decorated the slices by sprinkling with chopped roasted peanuts and then drizzling liberally with Salted Caramel Sauce.Tip: When cutting the cake, I find using a 'hot knife' (run the blade under hot water or dip into a bowl of boiling water and dry – repeat this for every cut). This way you will get nice clean slices.
Notes
- Ice Cream – I use a good quality store-bought ice cream but you can use homemade ice cream if you prefer. I mostly use vanilla however you can use any flavour you like! You can also use gelato.
- Toppings – I have used store-bought chopped roasted peanuts and Maggie Beer’s Salted Caramel Sauce which works beautifully with Vanilla Ice Cream. You can choose any toppings you like depending on the occasion and/or allergy considerations.
Tips and Tricks for Success:
- Before you start this recipe, make sure you have enough room in your freezer for your cake tin to sit upright and flat so you can just pop it straight in when it’s time to freeze it.
- It’s important to line both the base and sides of the baking tin with baking paper. This makes it much easier to un-mould the cake cleanly from the tin. Using a springform tin is important too or a loose bottom one.
- When baking the brownie, cooking times vary depending on your oven. It takes approximately 30-40 minutes. For this recipe, it is better to cook it more so it isn’t overly gooey in the centre.
- Another important step is to let the brownie cool completely – no shortcuts here. The brownie must be completely cooled down before adding the ice-cream topping.
- Once the brownie has cooled down, it is a good idea to level the brownie out by gently pressing around the edges of the brownie as the sides often rise more than the middle and there is often a slight gap between the edge and the tin. By gently pressing the edges down you are not only levelling it out (which makes it look more uniform) but you are also pressing the edges back down and filling the gap which means no ice-cream will leak down the sides when added.
- When melting the ice-cream, which takes approximately 15 minutes, only melt it until it is able to be mixed together to form a thick sludge consistency. You don’t want to melt it completely. Once it is partially melted, use a spoon to mix the more melted parts into the still firmer parts so it is all the same consistency, then spoon this onto the cooled base and gently spread it out evenly to form the top layer. Freeze immediately.
- To freeze the cake will take 4-5 hours but if you have the time, making it the day before it is required and freezing overnight is ideal. This cake can be made up to 7-10 days in advance.
- You can choose to decorate the cake as a whole cake, or slice and plate up before decorating slices individually. Either way, it is best to remove the frozen cake from the freezer 10-20 minutes before serving/decorating to allow the brownie to defrost slightly and the ice-cream to soften a little. Enjoy!


No Comments